These are management settings for the work order module. To access the settings area, navigate to Work Orders > More > Management Settings.
Warning: do not add any HOA/Association specific items here as they will show up for all associations.
Categories/Subcategories
Work orders are typically categoriezed in a hierarchy that defines what kind of work is being done (category) and where/how the issue manifested (subcategory).
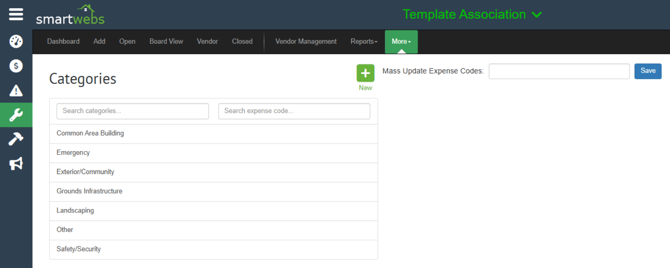

The user will set the category and subcategory when the work order is being created.

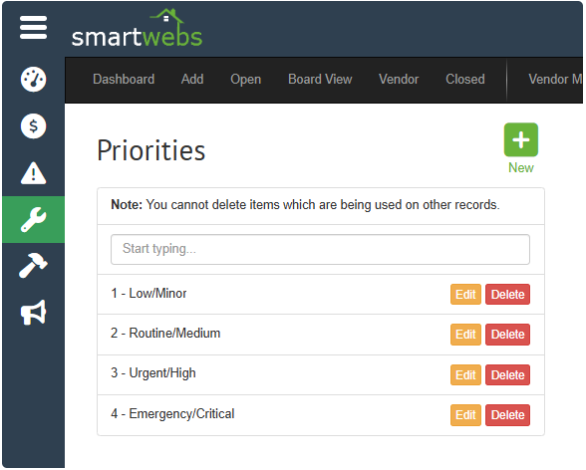
Priorities
Work order priorities are the cornerstone of effective maintenance mangement. They help the users determine which tasks or projects must be completed first and chosen by the user when creating/updating work orders.

Priorities will be listed in alphabetical order. It's recommded to list in number order (as shown below).
Statuses
Statuses are used to track the progress of a work order and chosen by the user when creating/updating a work order.

Each status in Smartwebs will need to be mapped to an open or closed state. Accuracy will ensure your filtered views are displaying the correct information.
Priorities will be listed in alphabetical order. It's recommded to list in number order (as shown below).

Due Date
In Smartwebs, you can either set the default as today (the day the work order is created) or Custom (how many days after the work order created date).
After making any changes, click Save. Changes will apply to any new work orders created.

When a new work order is created, a calculated due date will auto populate. The user can then adjust as needed.
![]()
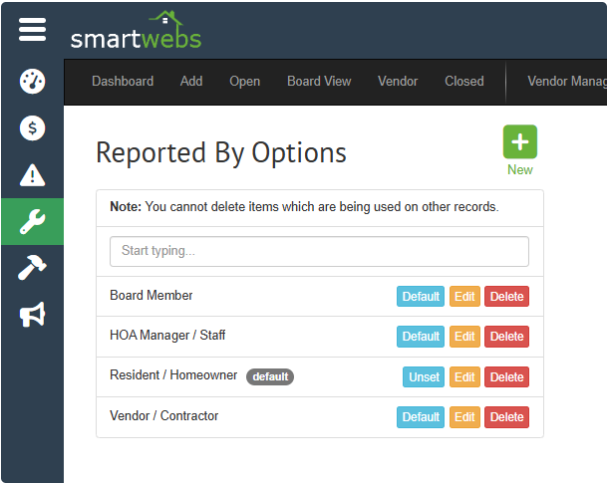
Reported By
The reported by field identifies the person or entity who initiated or submitted the request for maintenance, repair or service.
A default is required.
Filtered Views
Filtered views is a group or bucket or work orders that show in tabs. Each filtered view uses logic to determine what work orders should show in that tab. For each filtered view, you can:
- specify what columns in the grid to show
- specify which roles can see it
- specify if it's for the current association or all associations
- show, hide or make read-only fields
- set specific criteria or rules
Examples on where filtered views show:

Adding & Configuring Filtered Views:
Note: The order the filtered views are created is the order they will show in the header.
- Click the green New button to create a new filtered view.

- View Details
- Filtered view name - this is what will show on the top header
- Description - this will only be visible in the filtered view page
- Show Badge/Color - if checked, the number of work orders shown in the view will appear on the header.
- Default For - determines which view shows up navigating to work orders.

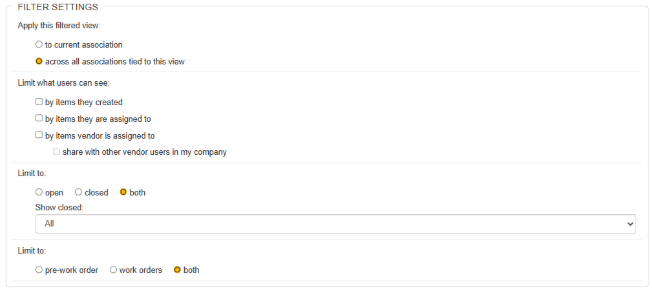
- Filter Settings
- Current or for all associations
- If set to current, only the workorders for that association will show. If set to all associations, the user will see work orders from all associations they are assigned to.
- Limit what users can see - most management staff will most likely need to see all, whereas vendors would only need to see what they are assigned to
- Limit to:
- Open/Closed or both, if selecting closed, you can limit the timeframe in the show closed dropdown
- Pre-work order, work orders or both - any work order submitted from the resident portal will be created as a pre-work order. Simply, this is a way to flag the work order as needing a first review.
- Current or for all associations
- Rules: This area is used if you want to set up more filters than what is available above. For example, if you only want to see amenities with Pool in the name, then you'd use this rule:

- Roles: Any roles that are checked in this area will have access to view the filtered view. It's important that any roles that have access to work orders is checked for at least one filtered view.

- Form Settings: Here you can set which part of the work order details and buttons you want visible, disabled or hidden. In the example below, notice how this view allows you to see who reported the issue, but you cannot edit it. Also, this view has the conclusion/summary hidden.

- Grid Settings: Configure the columns that are shown in the view, the order and the width.
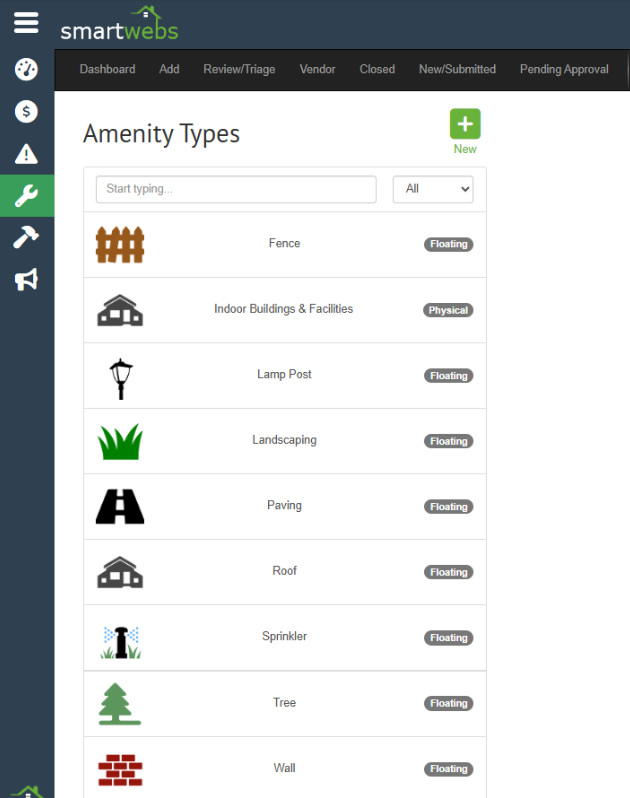
Amenity Types
Amentity Types is the general categories where the associaition specific amenities will be categorized into. There are two types of amentity types: Floating (mapped when the work order is created) and Physical (mapped when the amenity is created).
These should stay very high level and generalized.