
Navigation
To add new users, select the association from the dropdown that you wish to add them to, then do the following:
- Settings > Manage > Association > Association Users

Add Single New User
The following section will cover how to create a new user and assign them to their associations.
Step 1
From the User Management section, select the green "New User" plus icon in the top right of the page.
Step 2
The "Add New User" dialog will appear. Enter the user's information in the fields provided.
- Any red-starred sections are required fields, and the user cannot be created without filling these sections out.
- This is where you also select what role they have for that specific association (you can add more later)
Step 3
Check the "Send Password Link to This User" checkbox. This sends the new user an email so they can create their own password.
Step 4
Once all the information has been entered, select the "Save" button, and the user will be created.
- At this time you will be automatically taken to the user's profile, where you can then scroll down and add more associations if needed, or edit the role they have in their assigned association.
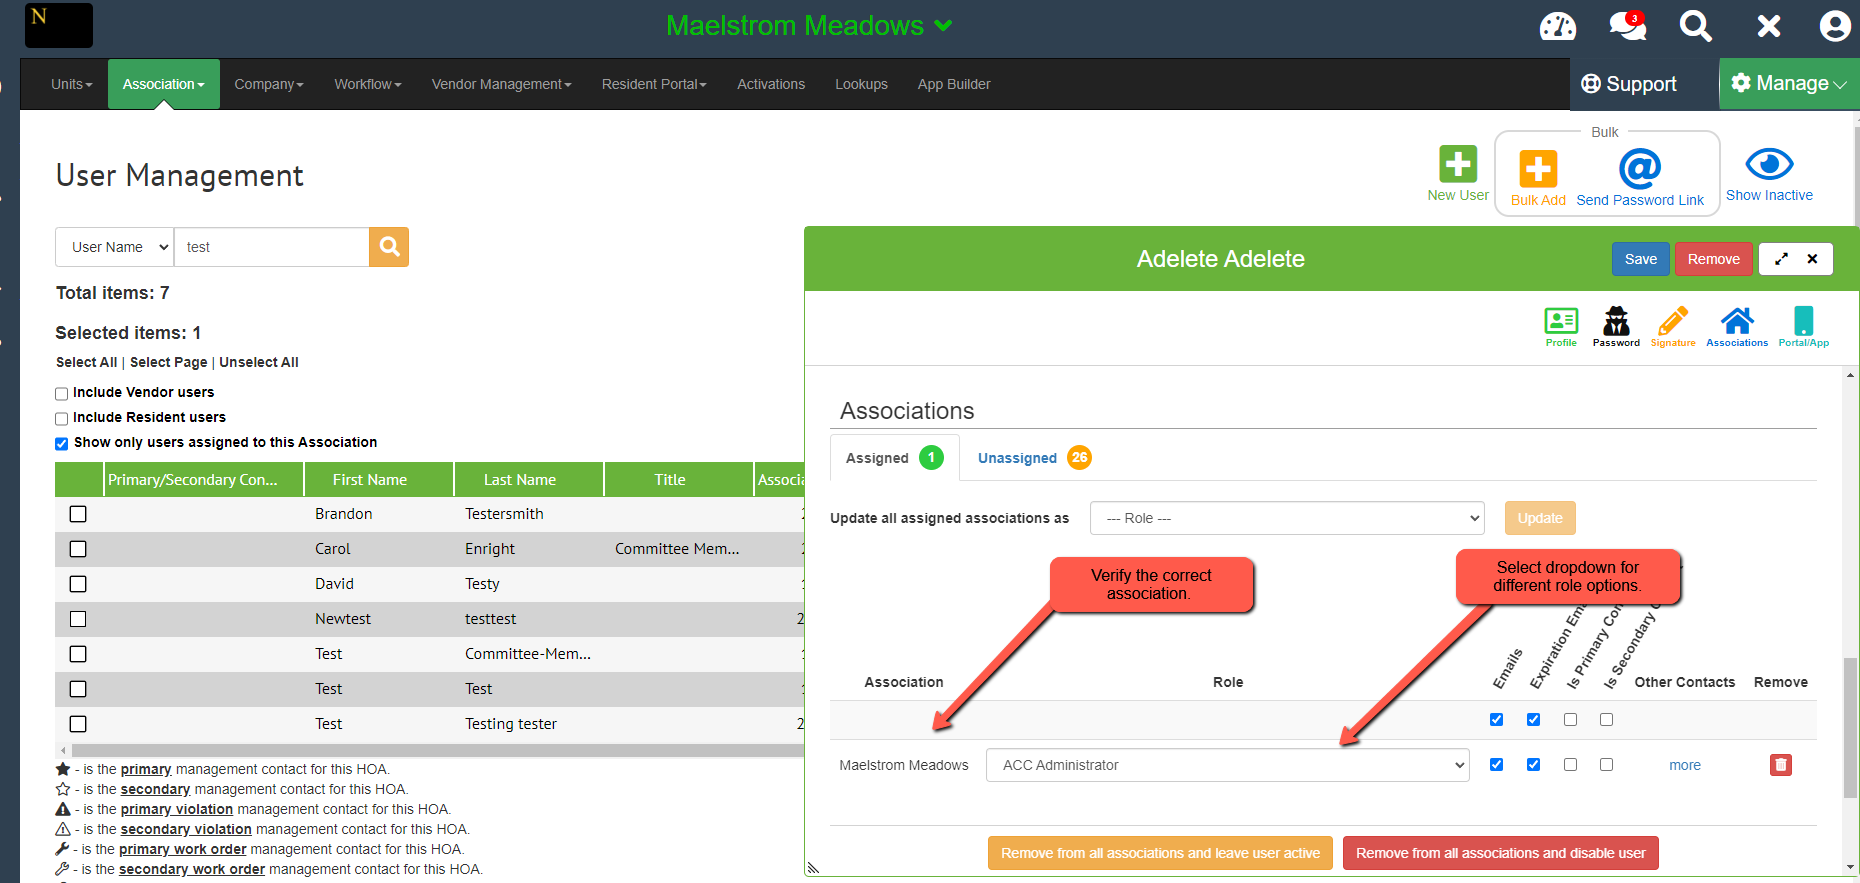
Step 5
If the user needs other associations assigned to them, scroll to the association section, and select the "Unassigned tab"
From there, find the association you wish to add, select their role from the dropdown, and press the green + button
Don't forget to press "Save" after any changes you make, and that user should now be able to set their password, login, and view the associations they are assigned to.
Bulk Add New Users
The following section will cover how to create multiple new users at once, and how to assign them to their associations.
Step 1
From the User Management section, select the yellow "Bulk Add" plus icon in the top right of the page.
Step 2
In the "Add Users" dialog, enter the user's information and assign each user a role for the association.
- Any red starred sections are required fields, and the users cannot be created without filling these sections out.
- As you fill out the user's information, another line will appear to let you create the next user.
Step 3
After filling out all user information, select "Save" and the users will be created.
You will now have to select those users and send them a password reset link, to let them choose a password for their account.
Step 4A - Send to a single user
Select the user > scroll down to Password > select the send password link button
Step 4B - Bulk send to users
In the user management page, select the check boxes next to the users you want to send the password link email to
Once all users are selected, click the "Send Password Link" button in the top right of the page.
A green confirmation banner will appear in the bottom right of the screen once the emails have been sent successfully. Users can then set their password and log in.