
Step 1: Set Resident Permissions
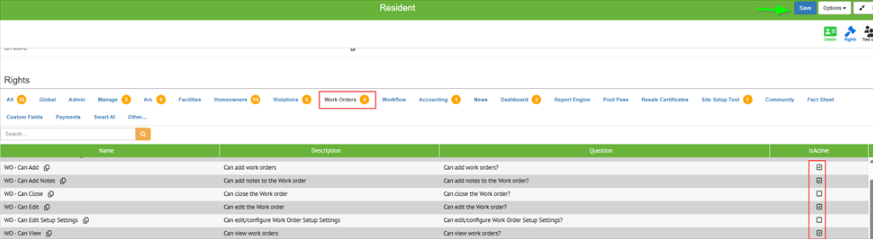
Allows residents to submit emergency work orders.
- Go to Manage > Company > Roles & Rights.
- Select the Resident Role and open the Work Order tab.
- Enable the following permissions:
- WO – Can Add
- WO – Can Add Notes
- WO – Can Edit
- WO – Can View
- Click Save.
Step 2: Assign Primary Staff Contacts
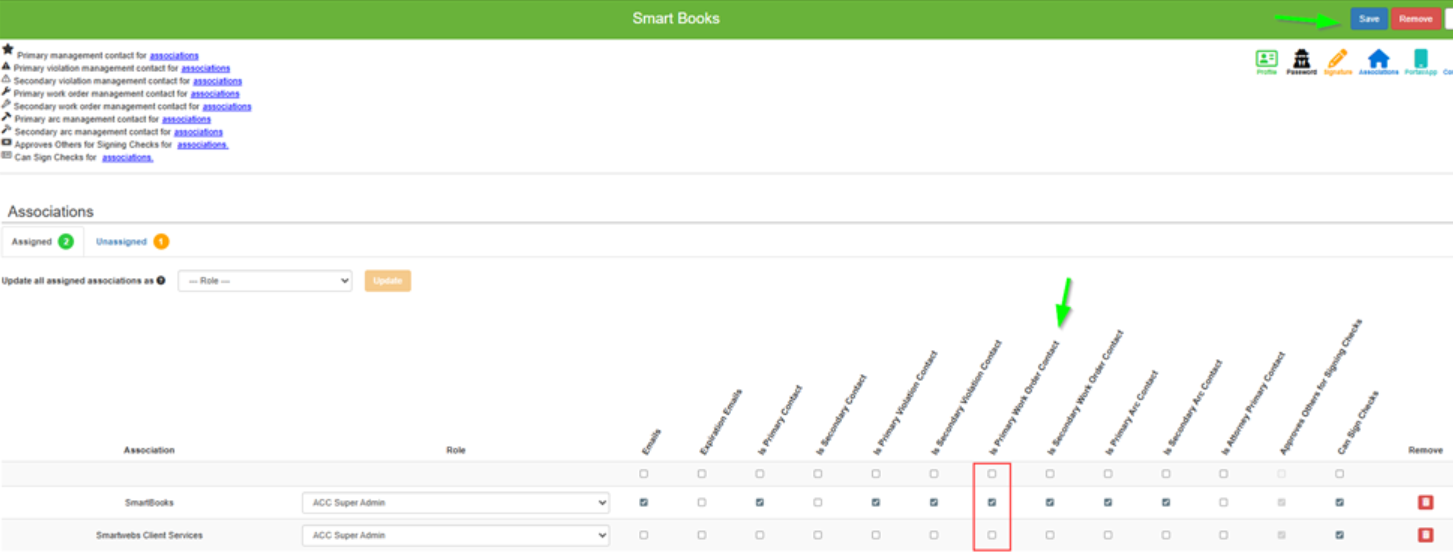
Ensures staff members receive emergency alerts.
- Go to Manage > Company > User Management.
- Search for and select the target staff member.
- Confirm their Email and Cell Phone are filled out.
- Under User Communication Preferences, check all applicable options: Email, Text, or Voice.
- Under Associations, check Is Primary Work Order Contact.
- Click Save.
Step 3: Create Notification Templates
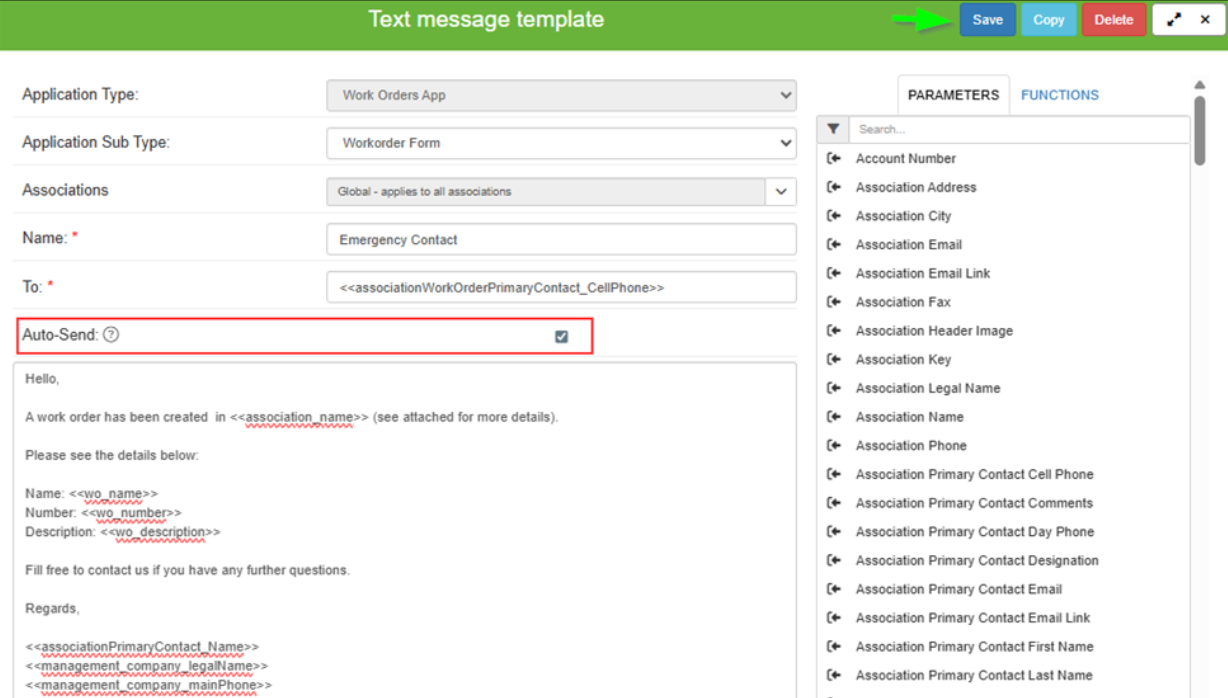
Builds the automated message templates.
- Go to Work Orders > More > Workflow > Email, Voice, Text Templates.
- Select the Email or Text tab to create your template with preferred verbiage.
- Check the Auto-Send box.
- Click Save
Step 4: Configure Categories, Amenity Types, & Amenities
Sets up the emergency taxonomy needed for automated routing.
| Location | Action | Settings to Apply |
| Work Orders > More > Management Settings > Categories | Click New |
Name: Subcategory Name: |
| Work Orders > More > Management Settings > Amenity Type | Click New |
Name: Icon: Choose preference Location Type: |
| Work Orders > More > Association Settings > Amenity Setup | Click New |
Name: Amenity Type: Default Category: Default Subcategory: |
Step 5: Set Up Triggers & Alerts
Configures the system to send an instant text when an emergency work order is submitted.
- Go to Work Orders > More > Workflow > Triggers.
- Click Details next to Work Order Created.
- Under the Rules tab, select New Work Order, then click Work Order Created.
- Change Logic Type to
If Then. - Click Add If:
- If (Group 1): Set
Work Order Created=True. - Then: Click Change, check New Work Order Email, and click OK.
- If (Group 1): Set
- Click Add Else If:
- Else If (Group 1): Select
Work Order Category Name=Emergency. - Then: Click Change.
- Under the Email tab, select New Work Order Email.
- Under the Text Message tab, select your emergency template (e.g., Emergency Work Order).
- Else If (Group 1): Select
- Check Auto send this communication.
- Click Save.
Step 6: Staff Processing Workflow
When an emergency ticket arrives, staff receive immediate alerts via email and text. Once reviewed, staff can reassign the work order category to a specific repair type (e.g., Plumbing, HVAC) without interrupting the notification system.