Overview
The use of reimbursements allows the user to create a payable to a homeowner without having to add the homeowner to the vendor list.
In addition, the payable does NOT reflect on the homeowners’ account records and it helps to avoid creating massive vendor lists for simple reimbursements to homeowners. (i.e. Board Members or Residents) Note: This is not the same as a refund (overpayment on owner account).
When processed in Smartwebs Accounting, reimbursements and refunds do not create vendors in the system but are treated in every other way as a regular payable (i.e. on reports, recognized as liabilities, etc.)
Example: A homeowner covers the cost to repair a fence in the community and needs to be reimbursed $60.00 for the incurred expense.
To add a “Reimbursement,” the payee must be an owner in the system and the payable must be processed in Smartwebs Accounting and not an integrating partner. (i.e. Strongroom).
**Note: If the user is using the Strongroom integration and wants to process the invoice through Strongroom, a separate vendor must be created.**
Creating the Invoice
- Navigate to Accounting > Payables > Invoices

- Select the blue "+ Reimbursement" button

- Search for a homeowner
- Enter an Invoice number
- Select a Cost Center
- Select the payment type (Check, Cash, ACH or Credit)
- Select the bank account to pay from
- The dates section will auto-populate with today's date; make edits where needed
- Choose a Debit Account - This is where you enter the GL Account where the funds are to come from (Expense GL). You can add multiple expense GL's if needed
- Enter the amount of the refund
- Enter a description
- File Upload - This is not required, but you can attach any supporting documents here
- Notes - This is not required
- Select the blue "Create" button

Approving the Invoice (Approval Engine Activated)
Now that you've added to reimbursement, it's time to approve it for posting. If you are not using the Approval Engine you will skip to: Posting the Invoice (without Approval Engine)
- Navigate to Accounting > Payables > Invoices

- Open the row for the invoice

- Select the green "Approve" button. If you have more than one level of approval you will need to repeat this process. Alternatively, you can also approve invoices in the Approval Engine module by selecting the Gavel Icon on the left. From here you can select multiple invoices at once or open each one individually.

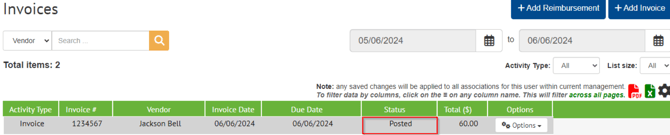
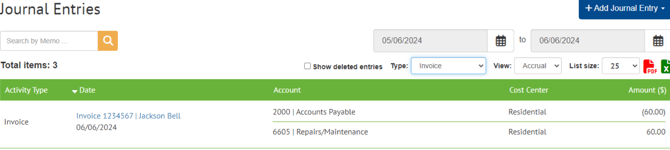
- Once approved, the status will change to "Posted" and your invoice Journal Entry will be created.


Posting the Invoice (without Approval Engine)
Now that you've added to reimbursement, it's time to post it.
- Navigate to Accounting > Payables > Invoices
- Open the row for the invoice.
- Select the blue "Post" button

Paying the Invoice
Once the reimbursement has been posted, you can now create payment.
- Navigate to Accounting > Payables > Invoices
- Select the row for the invoice
- Select the blue "Pay Invoice" button

- Select the blue "Save" button

Issuing the Reimbursement Check
- Navigate to Accounting > Payables > Checks
- The status will now show "Pending".

- Open the row for the payment. You can add additional notes at this time
- Select the blue "Save" button

- Select the box to the left of each check you want to print (or select all)
- Select the blue "Print Selected Checks" button
- Confirm the starting check number and check position on the check stock
- Select the blue "Print" button

- There will be a Pop-Up giving you options. For this example we will use the "View in a new tab" option.
- View in a new tab - This opens a new window with the check image
- Download - Allows you to name, then save a copy of the PDFEmail - Sends the PDF via email
- Post - Allows you to save the PDF to a document folder within the association documents.

- Select the blue "Open" button
- A confirmation Pop-Up will ask if the checks printed correctly; Select the orange " Yes" button to confirm

- The check will now show in the "Printed" tab instead of the "Pending" tab and will have a status of "Paid"

The Payment Journal Entry is now created. To view the Journal Entry: Navigate to Accounting > GL > Journal Entries. Here you will see the entry to debit the default Accounts Payable GL and credit the bank account GL.