
Step 1: Access the Homeowner Directory
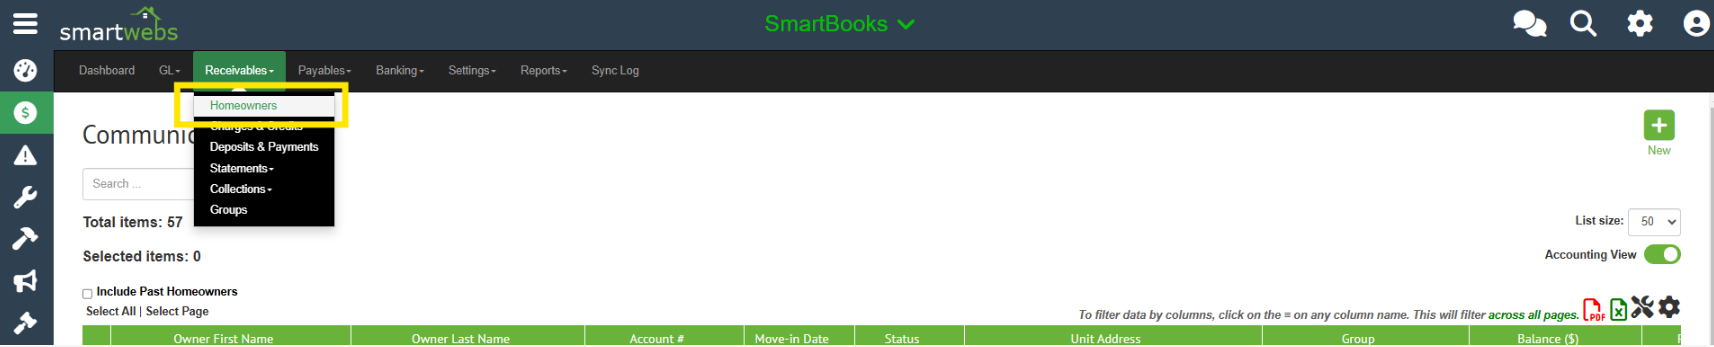
- Navigate to Accounting > Receivables > Homeowners.
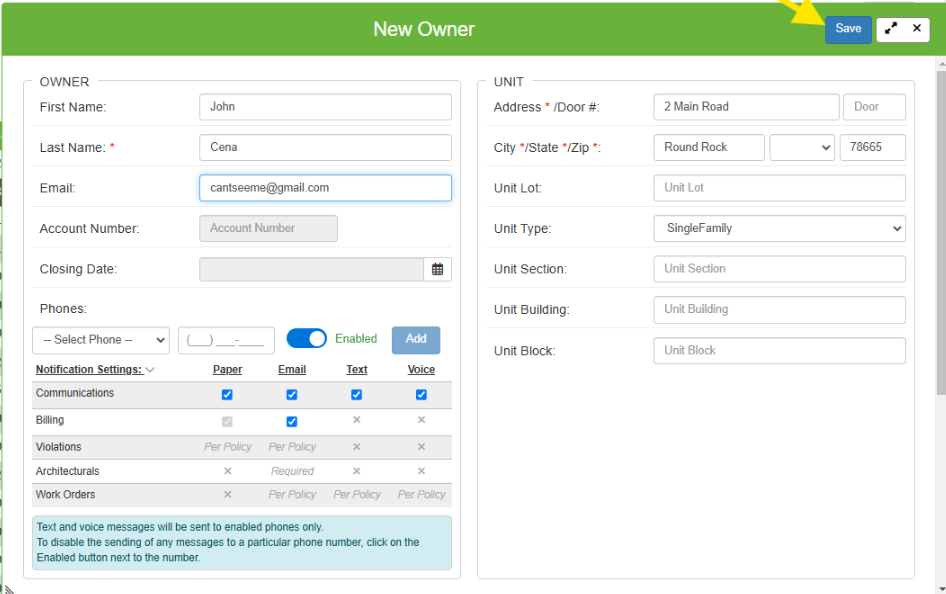
Step 2: Add the New Homeowner
- Open the Homeowner drawer.
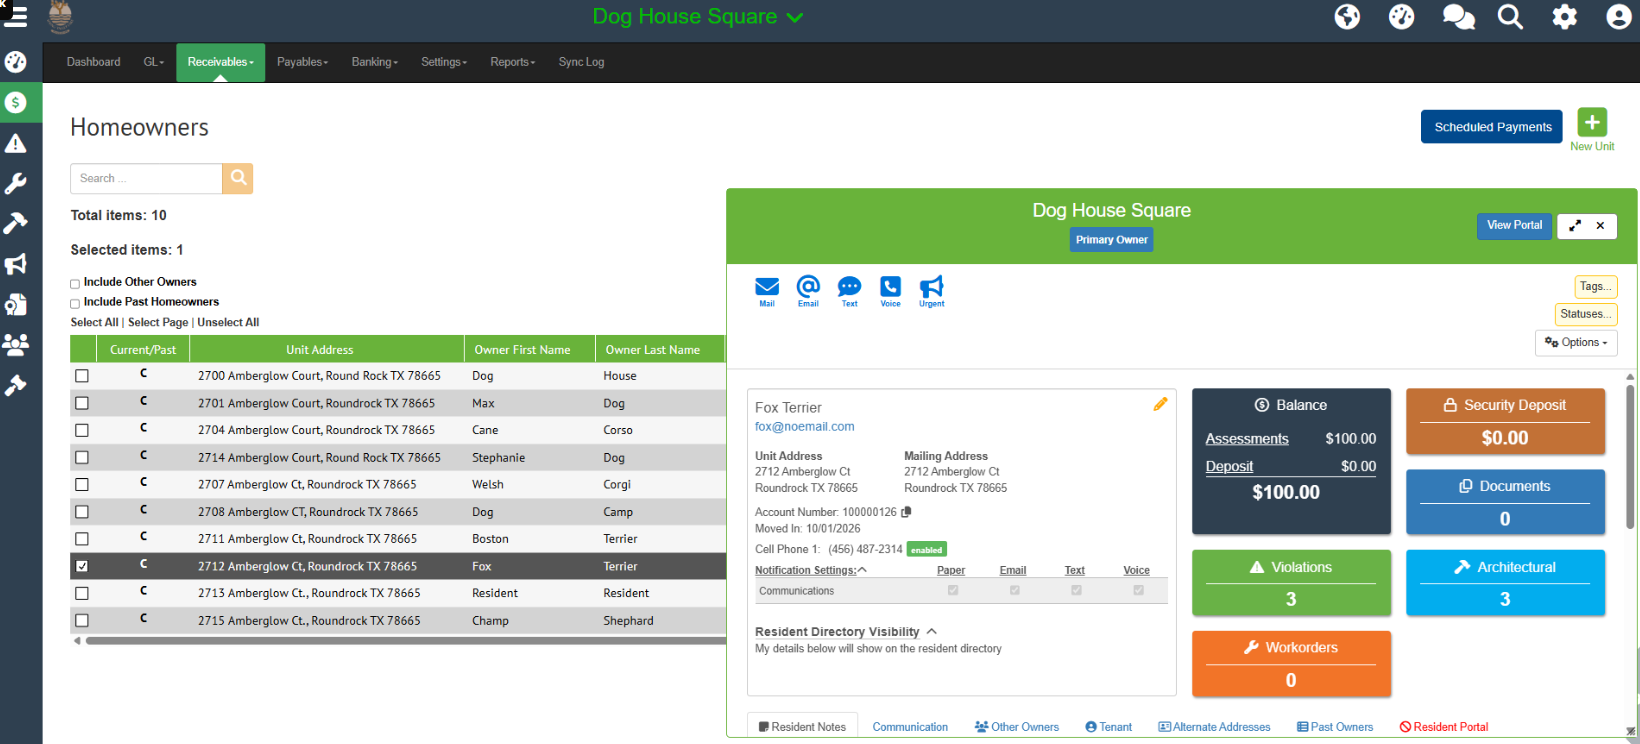
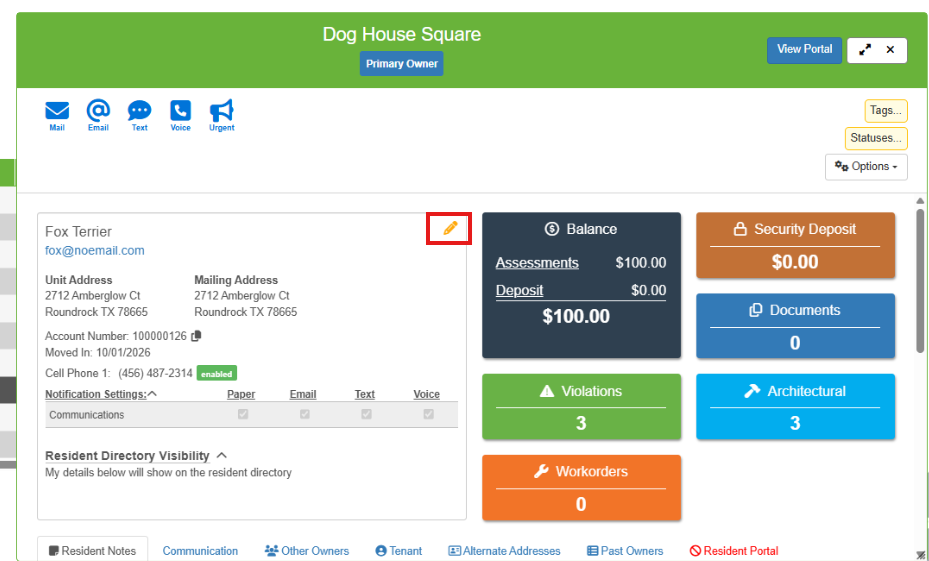
- Click the Pencil Icon.
- Select Create New.
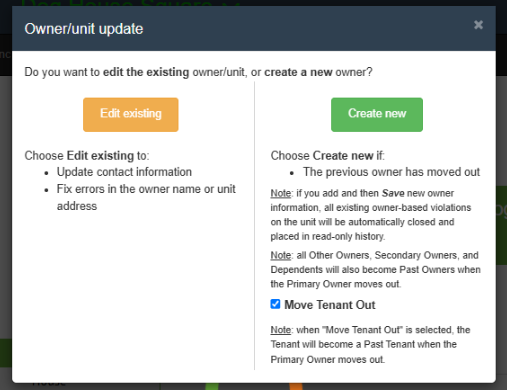
- Enter the new homeowner’s information, then click Save.
Step 3: Transfer Charges & Recurring Fees

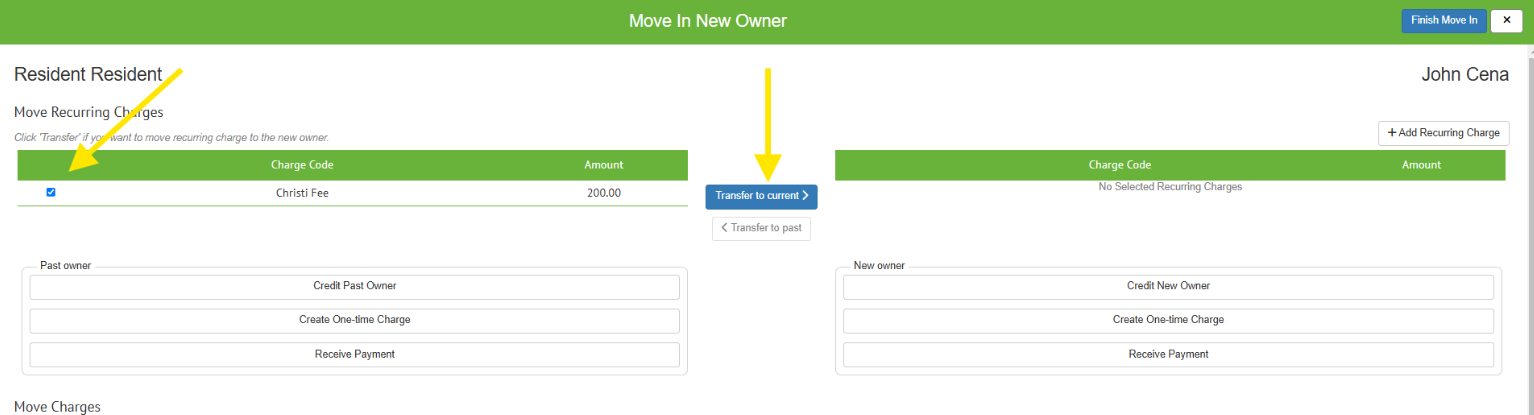
A transfer pop-up window will appear showing two columns:
- Left Side: Past Owner / Seller
- Right Side: New Owner / Buyer
To Transfer Items:
- Check the box next to any charge or recurring charge on the left side.
- Click Transfer to current.
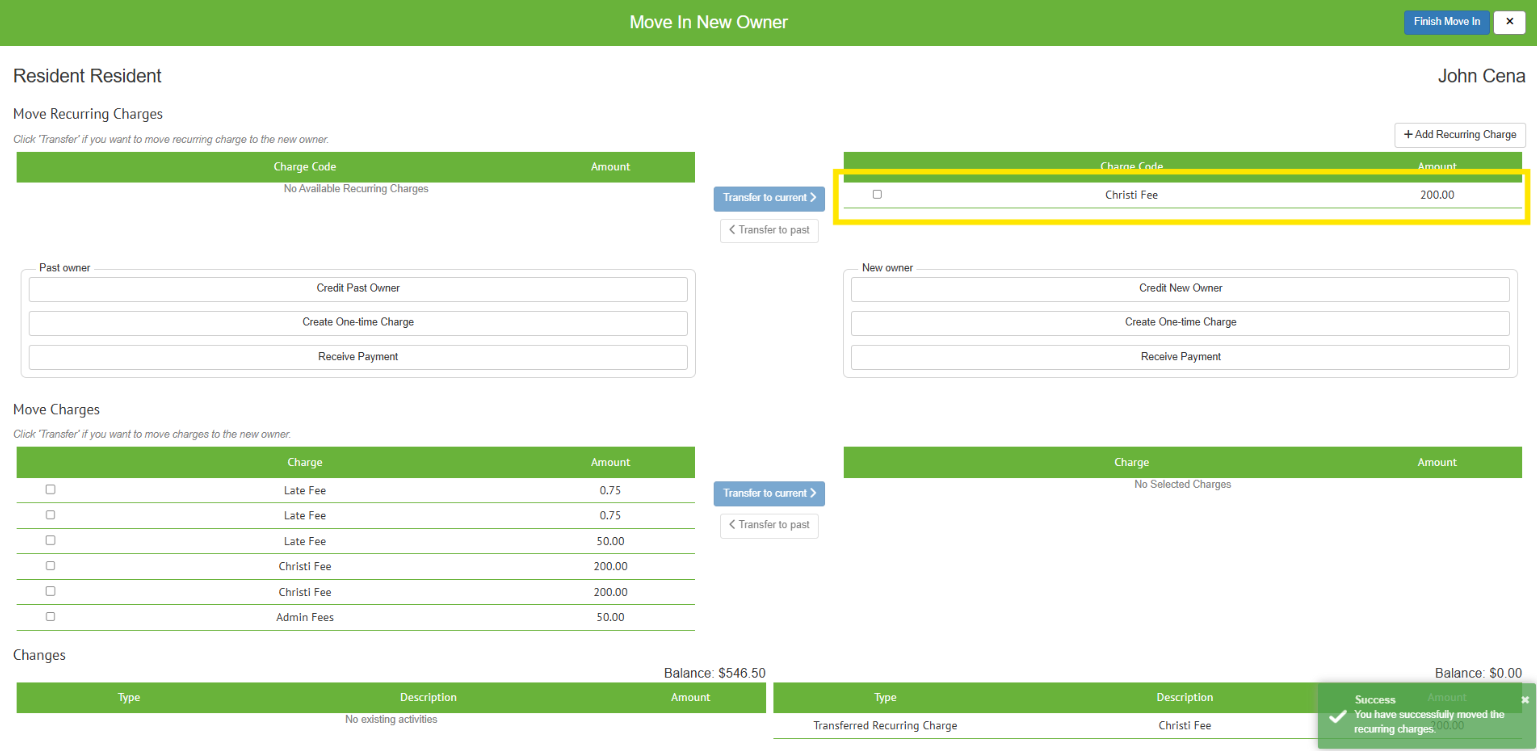
- Confirm the action by clicking Yes.

- Verify that the recurring charge now appears under the new homeowner on the right.
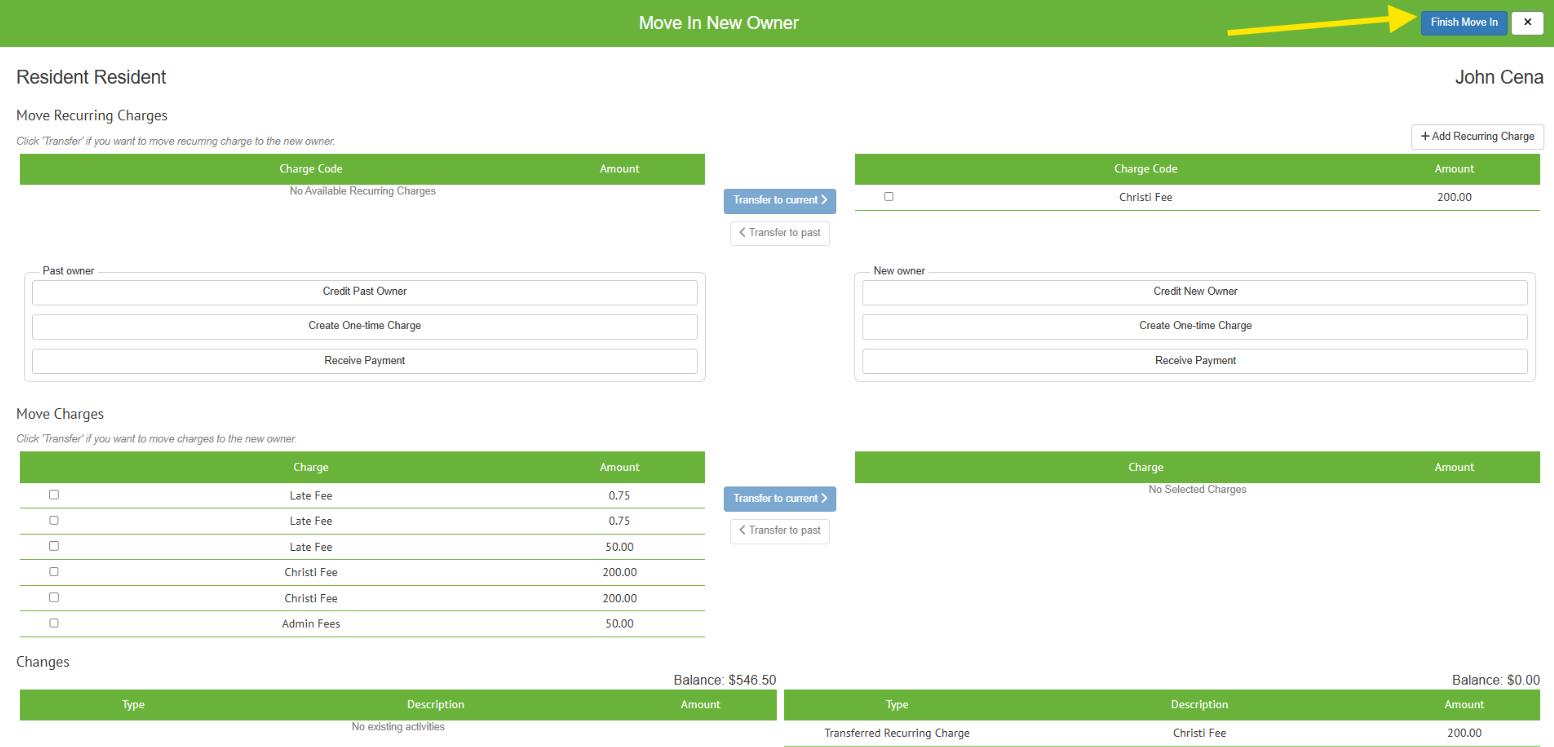
Step 4: Finalize the Move-In
- Once all charges are updated, click Finish Move in.
Step 5: Verify the Records
- Active Owner: The new owner will now display in both the main Homeowner grid and the Homeowner drawer.
- Past Owner History: To view former owners for this unit, select the Past Owner tab inside the homeowner drawer.