
Applying prepaids (unapplied deposits, payments, or homeowner credits) is the process of matching a previously recorded payment or credit to an outstanding charge or invoice. This process reduces or eliminates the outstanding balance on both transactions without generating any additional cash flow.
By regularly applying prepaids, you can help ensure homeowner accounts remain accurate, outstanding balances are properly reflected, and financial reports provide a more complete picture of your association's receivables.
Recommended Frequency
We recommend applying prepaids at least three times per month:
- After running charges: Apply available payments and credits to newly generated charges.
- Before adding late fees or interest: Ensure available prepaids are applied before calculating additional charges to homeowners.
- Before generating month-end financial reports: Confirm that available payments and credits have been applied to outstanding charges.
Setup: Configure Charge Codes
Before applying prepaids, you will want to review your Charge Code settings to ensure payments and credits are applied according to your association's intended workflow.
Step 1: Review Payment Order
- Navigate to Accounting > Settings > Charge Codes.
- Review the Payment Order to determine the order in which payments will be applied to outstanding charges.
To make changes to the payment order:
- Select Edit Payment Order.
- Drag and drop the Charge Codes into your preferred order.
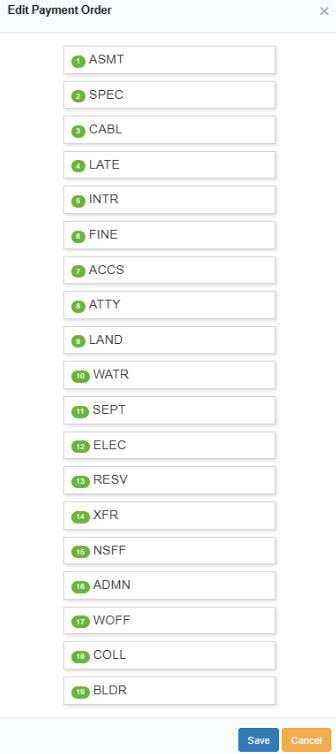
- Select Save to apply your changes.
The Payment Order determines which outstanding charges are paid first when payments or prepaids are applied.
Step 2: Configure Auto Apply Prepaids
Next, determine which Charge Codes should be eligible for automatic prepaid application.
If you do not want payments, credits, or prepaids to automatically apply toward a particular Charge Code, you can disable this setting for that code.
- Locate the Charge Code you wish to exclude.
- Uncheck the Auto Apply Prepaids box.
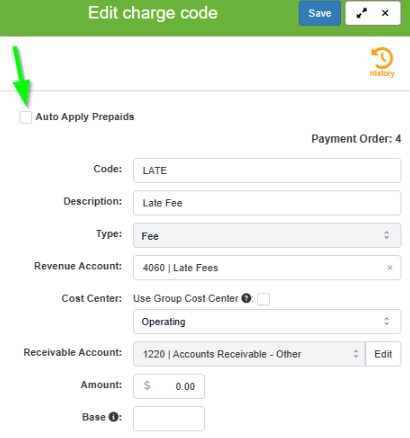
- Select Save.
Repeat this process for any additional Charge Codes you wish to exclude.
Important: Charge Codes with Auto Apply Prepaids disabled will be excluded by default when running the Apply Prepaids process. You can review the selected Charge Codes before submitting the process.
Processing: Apply Prepaids
Once your Charge Code settings have been configured, you are ready to apply available prepaids.
Step 1: Open Apply Prepaids
- Navigate to Accounting > Receivables > Deposits & Payments.
- Select the Apply Prepaids button.
Step 2: Select Subledgers
Review the Subledgers included in the process.
- By default, the available Subledgers will be included.
- To exclude a Subledger, select the X next to its name.

This allows you to control which Subledgers are included when applying available prepaids.
Step 3: Select Charge Codes
Review the Charge Codes selected for the process.
- Select or deselect Charge Codes depending on which outstanding charges you want payments and credits to apply toward.
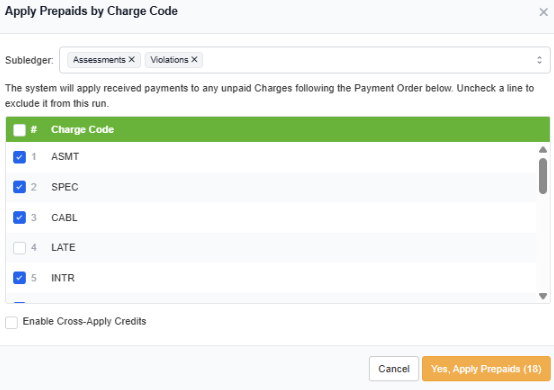
- Charge Codes with Auto Apply Prepaids disabled during setup will automatically be excluded by default.
For example, if you excluded the Late Fee Charge Code during setup, it will appear unselected when you open the Apply Prepaids screen.
Review your selections carefully before proceeding.
Step 4: Enable Cross-Apply Credits (Optional)
The Enable Cross-Apply Credits option allows available credits to be applied toward outstanding charges even when the credit and charge have different Charge Codes.
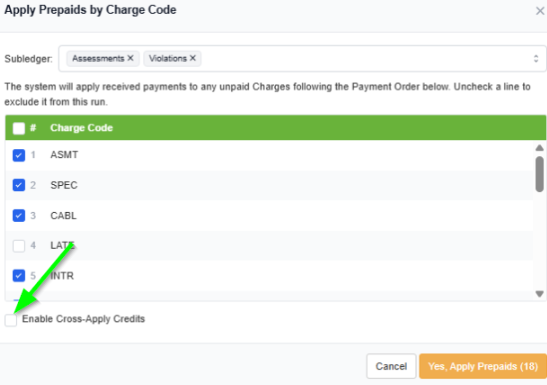
Example:
A homeowner has an available Late Fee credit and an outstanding Assessment charge.
- Without Cross-Apply Credits enabled, the credit will not be applied to the Assessment charge if the Charge Codes do not match.
- With Cross-Apply Credits enabled, the Late Fee credit can be applied toward the outstanding Assessment charge.
Important: Enabling Cross-Apply Credits will generate a journal entry to change the GL account associated with the original credit to match the GL account of the charge being paid. This ensures the accounting reflects the Charge Code of the transaction receiving the credit.
Be sure to review this option carefully before proceeding.
Step 5: Run Apply Prepaids
Once you have reviewed your Subledger and Charge Code selections:
- Select Yes, Apply Prepaids to begin processing.
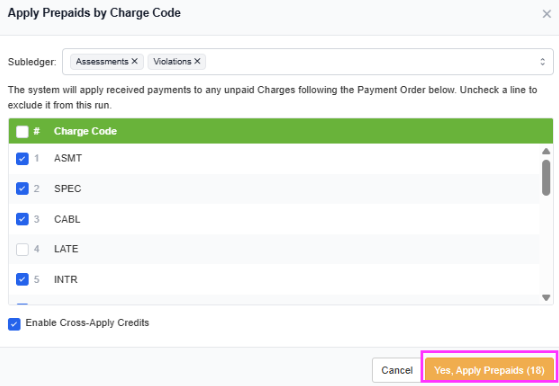
- The number displayed in parentheses indicates the number of Charge Codes selected for the process.
- Allow the system to complete the process.
You will receive a process confirmation memo when the request is submitted, followed by a completion memo once the process has finished.
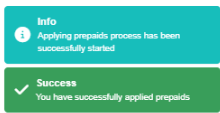
Your prepaids have now been applied!