This process will automatically run the collections process for you at the time(s) you indicate during the setup.
Keep in mind that this will only run the Collections process and will not automatically approve, print, or send any collection letters.
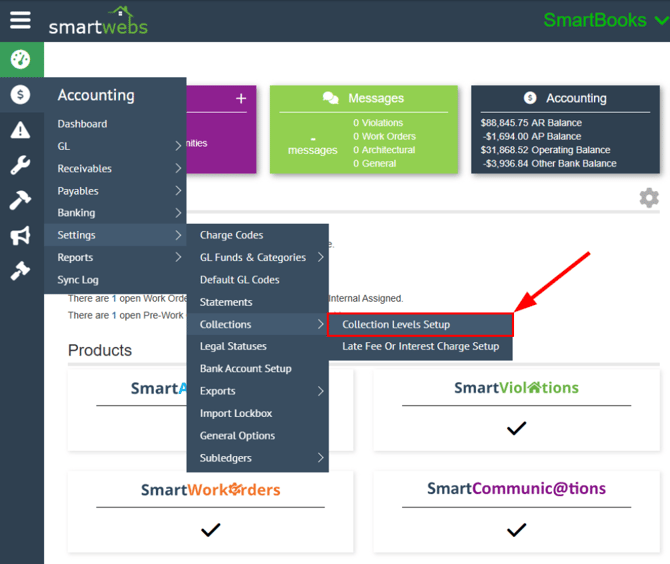
**This guide is to be followed only after you have already setup and configured your Collection settings. Refer to "User Guide - Collections Levels Setup" for directions.**
Navigation
Navigate to Accounting > Settings > Collections > Collection Levels Setup.
Setup
To setup a Running Collections Schedule:
- Select the "Running Schedule" dropdown then select the "On a Recurring Schedule" option.
- Set the "Recurrence Pattern" and the "Range of recurrence".
- You can reference the "Description" section to confirm that your Running schedule settings look correct.
- Select "Save"

Once setup you can view when the schedule will run in the "Running Schedule" row.

Sending Collection Letters
Although the Collection process will run automatically for you, you will still need to Approve, print and send the collection letters. Once the Collection Process runs you can navigate to the collection batch by going to:
- Accounting > Receivables > Collections > Pending Batches.
- You can View Charges, Approve or Delete the collection batch.

Once the Collection batch has been approved it will be housed in the "Print" tab where you can select the amount of letters to print and select "Print All".

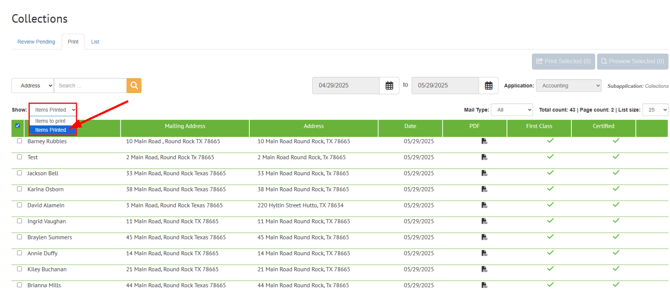
The history of collection letters printed will be housed in the "Items Printed" section: